
The Madaxeman
Madaxeman.com's Home Page
  • Home
  • Latest Posts
  • Links Page
  • Battle Reports
  • ADLG Index
  • ADLG Wiki
  • Malifaux
  • C London Club
  • 15mm Gallery
  • 15mm Suppliers
  • Facebook
  • The Podcast
  • 10mm
  • Consent Preferences
 RSS Feed

Madaxemans 10mm & Real World Photo Gallery

Photos from museums, and from my 10mm wargaming collection

  • Home
  • Login
  • Album list
    • Last uploads
    • Last comments
    • Most viewed
    • Top rated
    • By date
    • My Favorites
  • Search

The 10mm & Real World Museums Photo Directory - helping you choose the best 10mm tanks, or dig out real cammo schemes from tanks and other military vehicles in museums and shows around the world. You can also search the directory by manufacturer, army or keyword

Anyone can rate the photos just by clicking on the stars beneath each photo. Ratings use a scale of 0-5 where 5 = excellent and 0 = terrible.

Most viewed
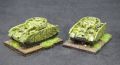
IMGP4863.JPG
PzIV113 views
IMG_2621.JPG
Avro Shackleton113 views
IMG_7727.JPEG
Avro Vulcan113 viewsAt RAF Cosford Museum
IMG_7673.JPEG
Mosquito113 views
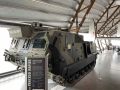
IMG_7733.JPEG
Tracked Rapier AA113 views
IMG_7744.JPEG
Armstrong Whitworth Argosy T.1113 views
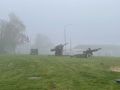
IMG_1736.JPEG
Artillery in the mist113 views
IMG_1740.JPEG
Breaking the law113 views
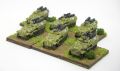
IMGP4292.JPG
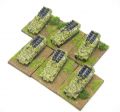
Red 3 Sdkfz Hanomags with crew112 viewsThew crew come as 2 strips of seated men and a separate gunner with gun and mantlet cast as a single piece
IMGP4295.JPG
Red 3 Sdkfz Hanomags with crew112 viewsThe crew come as 2 strips of seated men and a separate gunner with gun and mantlet cast as a single piece
3435 files on 344 page(s) 1 - 277 278 279 280 281 282 283 284 285 286 - 344


Visit Madaxeman on

Youtube Logo
Blogger Logo
Facebook Logo
Podbean Logo
Twitter Logo
Spotify Logo
Pinterest Logo
iTunes Logo
Tune In Logo

Podcasts to download from Madaxeman.com

(Also available on Podbean, iTunes and Spotify)


(These are "affiliate links". If you buy something after clicking on them I get a small kickback from eBay)

Page Loads for the 10mm & Museums Gallery:

About This Site & Privacy Information

Powered by Coppermine Photo Gallery